


VPS :Ubuntu 2020 x64
一、VMESS+TLS安装配置
1.1. 时间校准
对于 V2Ray,它的验证方式包含时间,就算是配置没有任何问题,如果时间不正确,也无法连接 V2Ray 服务器的,服务器会认为你这是不合法的请求。所以系统时间一定要正确,只要保证时间误差在一分钟之内就没问题。
1.2. 服务器端安装
下载安装脚本
curl -O https://raw.githubusercontent.com/v2fly/fhs-install-v2ray/master/install-release.sh
执行安装:
bash install-release.sh
如果安装不成功脚本会有红色的提示语句,这个时候你应当按照提示除错,除错后再重新执行一遍脚本安装 V2Ray。
设置开机自启动 V2Ray:
systemctl enable v2ray
使用以下命令启动 V2Ray:
systemctl start v2ray
停止运行 V2Ray:
systemctl stop v2ray
重启 V2Ray:
systemctl restart v2ray
在首次安装完成之后,V2Ray 不会自动启动,需要手动运行上述启动命令。而在已经运行 V2Ray 的 VPS 上再次执行安装脚本,安装脚本会自动停止 V2Ray 进程,升级 V2Ray 程序,然后自动运行 V2Ray。在升级过程中,配置文件不会被修改。
更新 V2Ray 的方法是再次执行安装脚本!
1.3.注册一个域名
如果已经注册有域名了可以跳过。 域名有免费的有付费的,总体来说付费的会优于免费的。
1.4. 证书生成
使用 TLS 需要证书,证书也有免费付费的,同样的这里使用免费证书,证书认证机构为 Let's Encrypt。 证书的生成有许多方法,这里使用的是比较简单的方法:使用 acme.sh 脚本生成,本部分说明部分内容参考于此处。
证书有两种,一种是 ECC 证书(内置公钥是 ECDSA 公钥),一种是 RSA 证书(内置 RSA 公钥)。简单来说,同等长度 ECC 比 RSA 更安全,也就是说在具有同样安全性的情况下,ECC 的密钥长度比 RSA 短得多(加密解密会更快),强烈建议使用 ECC 证书。
证书生成只需在服务器上操作。
1.4.1. 安装 acme.sh
执行以下命令,acme.sh 会安装到 ~/.acme.sh 目录下。
curl https://get.acme.sh | sh
可以创建 一个 bash 的 alias, 方便使用
alias acme.sh=~/.acme.sh/acme.sh
可能要安装依赖
apt install socat -y
1.4.2. 使用 acme.sh 生成证书
选择安装证书的类型:由于acme.sh将默认安装的证书类型从letsencrypt换成了zerossl,想要继续使用 letsencryp 证书,有两种解决方案。
第一种是签发证书时指定 CA
acme.sh --issue -d mydomain.me --server letsencrypt
另一种是直接更改默认 CA,本博文使用这种方式。
acme.sh --set-default-ca --server letsencrypt
如果设置了默认的 CA,以后就算版本升级也将一直默认使用指定的 CA。
证书生成
以下的命令会临时监听 80 端口,请确保执行该命令前没有被占用
acme.sh --issue -d mydomain.me --standalone -k ec-256
-k 表示密钥长度,后面的值可以是 ec-256 、ec-384、2048、3072、4096、8192,带有 ec 表示生成的是 ECC 证书,没有则是 RSA 证书。在安全性上 256 位的 ECC 证书等同于 3072 位的RSA 证书。
查看已经安装的证书、申请日期、更新日期等
acme.sh --list
证书更新
由于 Let's Encrypt 的证书有效期只有 3 个月,因此需要 90 天至少要更新一次证书,acme.sh 脚本会每 60 天自动更新证书。也可以手动更新。
手动更新 ECC 证书,执行:
acme.sh --renew -d mydomain.me --force --ecc
如果是 RSA 证书则执行:
acme.sh --renew -d mydomain.me --force
1.4.3. 安装证书和密钥
证书生成以后, 接下来需要把证书 copy 到真正需要用它的地方(目录可以自己选择)
mkdir -p /root/cert
acme.sh  --installcert  -d  mydomain.me  --ecc  \
        --key-file   /root/cert/private.key \
        --fullchain-file /root/cert/cert.crt
以上是80 端口空闲的申请方式,不便之处是80端口被占用的话,是不能自动更新证书的。
更方便的是DNS方式申请,参考这里 第五点。
1.5. 配置 V2Ray
1.5.1. 服务器端json配置文件
编辑配置文件 vi /usr/local/etc/v2ray/config.json
{
  "log": {
      "loglevel": "warning"
    },
"inbounds": [
    {
      "port": 443,
      "protocol": "vmess",
      "settings": {
        "clients": [
          {
            "id": "23ad6b10-8d1a-40f7-8ad0-e3e35cd38297",
            "alterId": 0
          }
        ]
      },
      "streamSettings": {
        "network": "tcp",
        "security": "tls",
        "tlsSettings": {
          "certificates": [
            {
              "certificateFile": "/root/cert/cert.crt",
              "keyFile": "/root/cert/private.key"
            }
          ]
        }
      }
    }
  ],
  "outbounds": [
    {
      "protocol": "freedom",
      "settings": {}
    }
  ]
}
1.5.2. 客户端json配置文件
{
  "inbounds": [
    {
      "port": 1080,
      "protocol": "socks",
      "sniffing": {
        "enabled": true,
        "destOverride": ["http", "tls"]
      },
      "settings": {
        "auth": "noauth"
      }
    }
  ],
  "outbounds": [
    {
      "protocol": "vmess",
      "settings": {
        "vnext": [
          {
            "address": "mydomain.me",
            "port": 443,
            "users": [
              {
                "id": "23ad6b10-8d1a-40f7-8ad0-e3e35cd38297",
                "alterId": 0
              }
            ]
          }
        ]
      },
      "streamSettings": {
        "network": "tcp",
        "security": "tls"
      }
    }
  ]
}
1.5.2.1 客户端json配置文件(绕过国内域名及IP)
上面的客户端配置是全局的,也就是说访问所有的网站都将翻墙。但v2ray可以配置路由,绕过国内域名及IP,将配置文件改成如下即可(服务器端无需修改)
{
  "inbounds": [
    {
      "port": 1080,
      "protocol": "socks",
      "sniffing": {
        "enabled": true,
        "destOverride": ["http", "tls"]
      },
      "settings": {
        "auth": "noauth"
      }
    }
  ],
  "outbounds": [
    {
      "protocol": "vmess",
      "settings": {
        "vnext": [
          {
            "address": "mydomain.me",
            "port": 443,
            "users": [
              {
                "id": "23ad6b10-8d1a-40f7-8ad0-e3e35cd38297",
                "alterId": 0
              }
            ]
          }
        ]
      },
      "streamSettings": {
        "network": "tcp",
        "security": "tls"
      }
    },
 {
      "protocol": "freedom",
      "settings": {},
      "tag": "direct"
    }
  ],
  "routing": {
    "domainStrategy": "IPOnDemand",
    "rules": [
      {
        "type": "field",
        "outboundTag": "direct",
        "domain": ["geosite:cn"]
      },
      {
        "type": "field",
        "outboundTag": "direct",
        "ip": [
          "geoip:cn",
          "geoip:private"
        ]
      }
    ]
  }
}
说明:配置文件很容易出错,最好还是使用 V2Ray 提供的配置检查功能(test 选项),因为可以检查 JSON 语法错误外的问题。
/usr/local/bin/v2ray -test -config /usr/local/etc/v2ray/config.json
一般来说,按照以上步骤操作完成,V2Ray 客户端能够正常联网说明 TLS 已经成功启用。但要是有个可靠的方法来验证是否正常开启 TLS 无疑更令人放心。
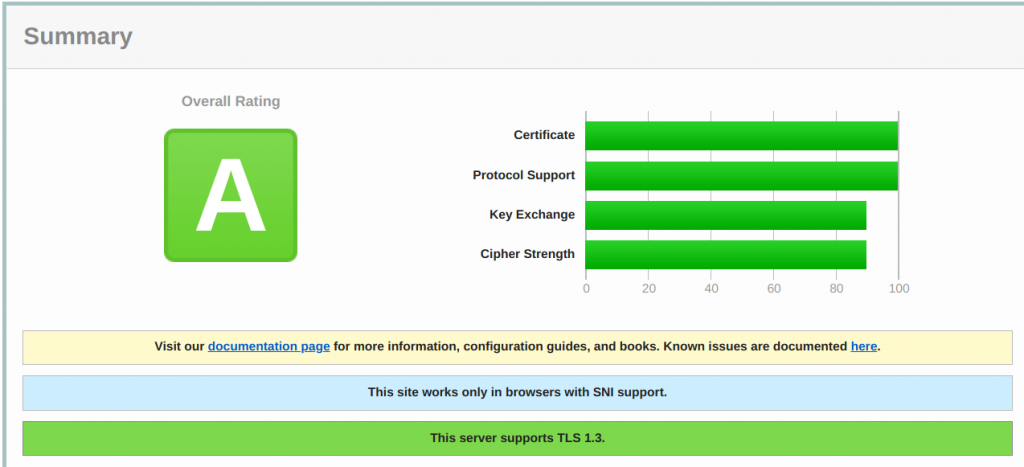
打开 Qualys SSL Labs's SSL Server Test,在 Hostname 中输入你的域名,点提交,过一会结果就出来了。
这是对于你的 TLS/SSL 的一个总体评分,我这里评分为 A,看来还不错。有这样的界面算是成功了。


最后,启动并设置客户端,就可以自由上网了。
二、VMESS+TLS+WS安装配置
2.1. 安装服务器端v2ray及申请证书,同上
2.2. 服务器端配置文件
编辑配置文件 vi /usr/local/etc/v2ray/config.json,实际使用中需删除注释
{
 "log": {
        "loglevel": "warning"
    },
"inbounds": [
    {
      "port": 10000,     //端口可设置任何未被占用的,但必须与nginx配置文件中的一致
      "listen":"127.0.0.1",
      "protocol": "vmess",
      "settings": {
        "clients": [
          {
            "id": "23ad6b10-8d1a-40f7-8ad0-e3e35cd38297", //与客户端保持一致
            "alterId": 0      //与客户端一致
          }
        ]
      },
      "streamSettings": {
        "network": "ws",
        "wsSettings": {
        "path": "/rayghrh"  //与nginx配置文件中的location地址保持一致
        }
      }
    }
  ],
  "outbounds": [
    {
      "protocol": "freedom",
      "settings": {}
    }
  ]
}
测试配置文件
/usr/local/bin/v2ray -test -config /usr/local/etc/v2ray/config.json
2.3. 安装配置nginx
apt install nginx -y
systemctl start nginx
systemctl enable nginx
配置文件 vi /etc/nginx/nginx.conf
user www-data;
worker_processes 1;
error_log /var/log/nginx/error.log;
pid /var/run/nginx.pid;
events {
    worker_connections  2048;
}
http {
    server_tokens off;
    include       mime.types;
    default_type  application/octet-stream;
    access_log off;
    sendfile        on;
    tcp_nopush     on;
    tcp_nodelay on;
    keepalive_timeout  65;
    gzip  on;
    client_max_body_size 10m;
    client_body_buffer_size 128k;

 server {
        listen       80 default_server;
        server_name  mydomain.me;
        root         /usr/share/nginx/html;
        return 301 https://$server_name$request_uri;
        error_page 404 /404.html;
            location = /40x.html {
        }
        error_page 500 502 503 504 /50x.html;
            location = /50x.html {
        }
}

server {
  listen  443 ssl;
  server_name           mydomain.me;
  ssl_certificate      /root/cert/cert.crt;
  ssl_certificate_key  /root/cert/private.key;

  ssl_protocols TLSv1.2 TLSv1.3;
  ssl_ciphers HIGH:!aNULL:!MD5;
  ssl_prefer_server_ciphers on;
   #WS协议转发
   location /raygrgf {       #任意字母及数字组合,但必须与v2ray服务端配置文件的path地址一致
        proxy_redirect off;
        proxy_pass http://127.0.0.1:10000;   #端口与v2ray服务端配置文件中的一致
        proxy_http_version 1.1;
        proxy_set_header Upgrade $http_upgrade;
        proxy_set_header Connection "upgrade";
        proxy_set_header Host $http_host;
        }
  #其他请求转发
  location / {
       proxy_pass http://127.0.0.1:80; #建议配置可以正常访问,实现伪装
    }
}
}
测试配置文件
/usr/sbin/nginx -t -c /etc/nginx/nginx.conf
一切正常的话,重启下VPS
2.4. 客户端json配置文件
{
  "inbounds": [
    {
      "port": 1080,
      "listen": "127.0.0.1",
      "protocol": "socks",
      "sniffing": {
        "enabled": true,
        "destOverride": ["http", "tls"]
      },
      "settings": {
        "auth": "noauth",
        "udp": false
      }
    }
  ],
  "outbounds": [
    {
      "protocol": "vmess",
      "settings": {
        "vnext": [
          {
            "address": "mydomain.me",
            "port": 443,
            "users": [
              {
                "id": "23ad6b10-8d1a-40f7-8ad0-e3e35cd38297",
                "alterId": 0
              }
            ]
          }
        ]
      },
      "streamSettings": {
        "network": "ws",
        "security": "tls",
        "wsSettings": {
          "path": "/rayghrh"   //与服务器端保持一致
        }
      }
    }
  ]
}
三、客户端安装配置
1、官方这里下载 V2Ray 的 Windows 压缩包。 下载解压之后会有 v2ray.exe 和 config.json 这两个文件,v2ray.exe 是运行 v2ray 的文件,config.json 是配置文件。你可以通过记事本或其它的文本编辑器查看和修改。
Windows下v2ray开机自动运行设置。
新建vbs文件v2raystart.vbs,写入以下内容并保存:
set ws=WScript.CreateObject("WScript.Shell")
ws.Run "F:\v2ray\v2ray.exe  -c F:\v2ray\config.json",0
文件路径修改为自己电脑上的实际路径。
win 10 下直接将v2raystart.vbs文件复制到其开机启动文件夹即可
C:\ProgramData\Microsoft\Windows\Start Menu\Programs\Startup
快捷命令:按下 win+R 打开运行输入:shell:Common Startup
浏览器里设置代理,也可使用 SwitchyOmega插件等 。
2、Clash 是一款用 Go 语言编写的、基于规则的隧道(Tunnel )程序,它支持多种加密通信协议和跨平台,目前已知 Clash 核心支持的加密协议就有 Vmess、Shadowsocks、Trojan(Go)、Snell 等。它可基于规则进行分流,默认支持socks及http代理。在windows下有相应的软件clash for windows,但可惜没有开源。有强迫症的朋友其实也可以在命令行下使用。
将下载的windows对应版本解压到制定目录下如F:\clash ,在此目录编辑配置文件config.yaml,官方配置文档参考这里。以下是个简单的配置,根据自己实际情况修改
port: 7890
socks-port: 7891
redir-port: 7892
allow-lan: false
mode: Rule
log-level: warning
external-controller: 127.0.0.1:9090
secret: "123456"
proxies:
- name: "v2ray"
type: vmess
server: domain.com
port: 443
uuid: uuid
alterId: 0
cipher: auto
udp: true
tls: true
network: ws
skip-cert-verify: true
ws-opts:
path: /your-ws-path
headers:
Host: domain.com
proxy-groups:
- name: Auto - UrlTest
type: url-test
proxies:
- "v2ray"
url: https://cp.cloudflare.com/generate_204
interval: "600"
tolerance: "150"
- name: Proxy
type: select
proxies:
- Auto - UrlTest
- DIRECT
- "v2ray"
rules:
- GEOIP,CN,DIRECT
- MATCH,Proxy
开机启动设置参考第1点。新建vbs文件clashstart.vbs,写入以下内容并保存,复制到其开机启动文件夹
set ws=WScript.CreateObject("WScript.Shell")
ws.Run "F:\clash\clash.exe  -f  F:\clash\config.yaml",0
3、v2rayN,支持v2ray,xray,trojan(trojan-go)的windows下图形客户端。v2rayA ,支持v2ray,xray,trojan(trojan-go)的linux和windows下图形客户端。