
主题:Debian11系统搭建Xray实现多人共享SSL自动更新预防IP被封-一键启用CloudFlare拯救被墙IP的完美教程
系统:Debian11/Debian10/Ubuntu
软件:可视化面板Xray-BBR+FQ-MTP-SmartPing
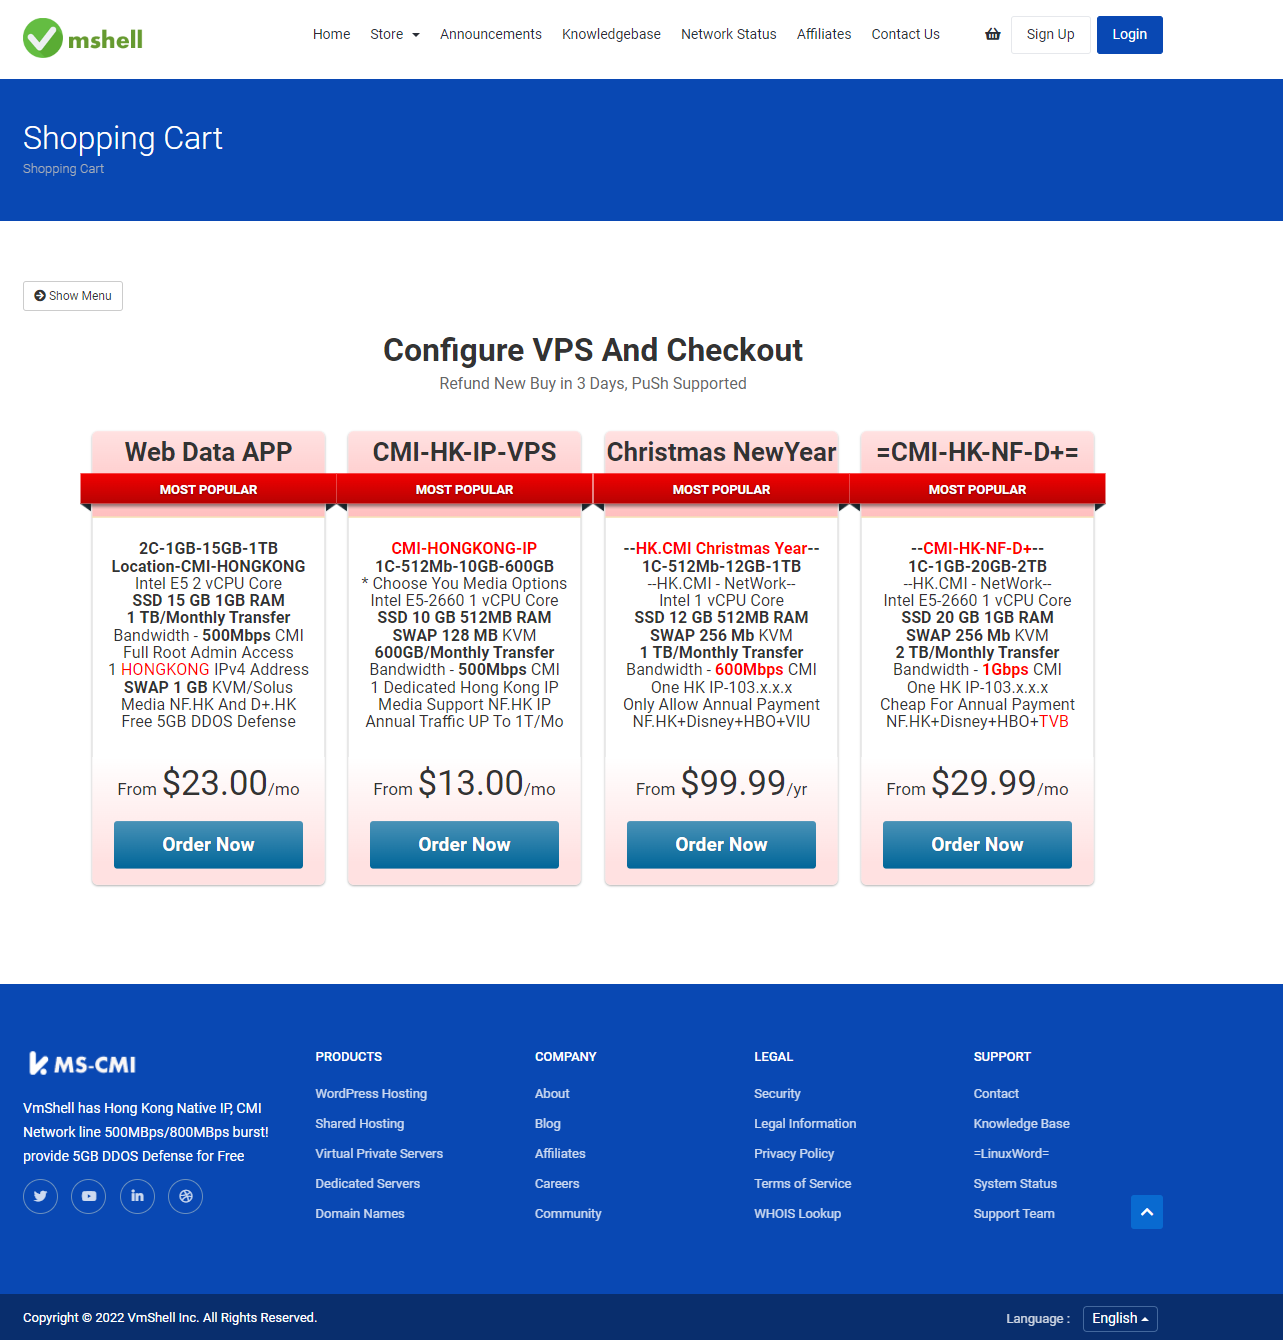
VPS服务商:VmShell INC Https://vmshell.com
网络线路:CMI.HONGKONG-1Gbps
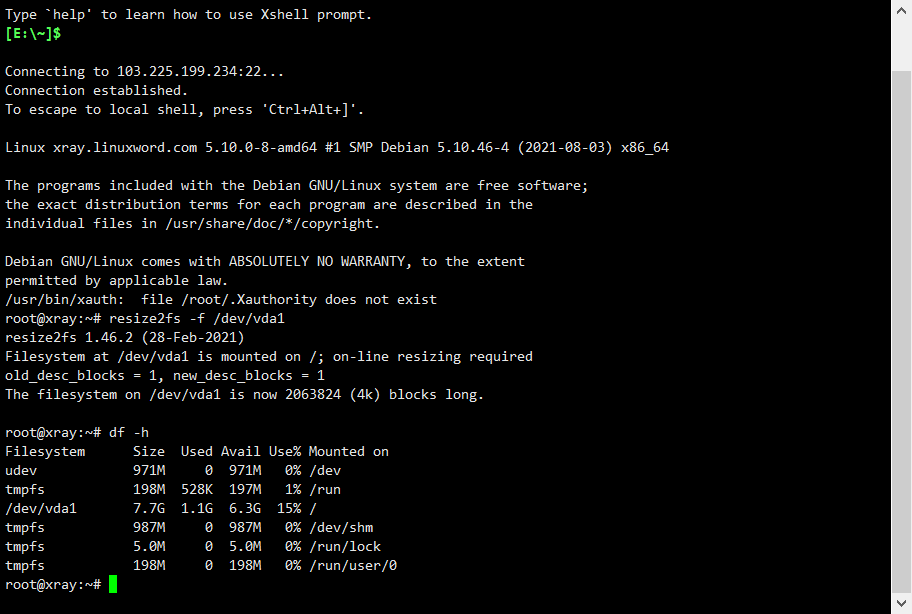
第一步:整合系统磁盘 (Debian11和Ubuntu20需要使用) ,设置后可以输入 df-h查看硬盘情况
代码:resize2fs -f /dev/vda1
第二步:安装必要组件:
apt -y update && apt -y upgrade && apt -y install curl wget unzip zip nano vim openssl cron socat nodejs npm screen && screen -S setupscreen
第三步:启用BBR+FQ协议(后reboot重启)
wget --no-check-certificate https://github.com/teddysun/across/raw/master/bbr.sh && chmod +x bbr.sh && ./bbr.sh
或者
wget -N --no-check-certificate "https://raw.githubusercontent.com/chiakge/Linux-NetSpeed/master/tcp.sh" && chmod +x tcp.sh && ./tcp.sh

第四步:安装子域名申请SSL文件并设置自动更新:
A-acme证书申请:(证书安装必须在nginx之前,不然nginx会占用80端口,懂得关闭nginx的可以无视),可以创建一个窗口安装: screen -S update 命令后执行:
apt -y install -y openssl cron socat curl unzip vim
下面这个申请代码已经更新,email=后面这里要输入你的一个邮箱要输入一个邮箱,否则会报错

curl https://get.acme.sh | sh -s email=admin@way-run.com
source ~/.bashrc
.acme.sh/acme.sh --issue -d xray.way-run.com --standalone -k ec-256

我们得到的信息如下请保存好:
Your cert is in: /root/.acme.sh/xray.way-run.com_ecc/xray.way-run.com.cer
Your cert key is in: /root/.acme.sh/xray.way-run.com_ecc/xray.way-run.com.key
The intermediate CA cert is in: /root/.acme.sh/xray.way-run.com_ecc/ca.cer
And the full chain certs is there: /root/.acme.sh/xray.way-run.com_ecc/fullchain.cer

设置对应的SSL目录权限: chmod 777 /root/.acme.sh/xray.way-run.com_ecc/
#(记得cret和key要有777的权限,没有就手动添加,不然启动xray会报错23)
执行更新的命令自动: acme.sh --upgrade --auto-upgrade
如果不能访问需要强制更新SSL文件,请输入命令:
source ~/.bashrc
.acme.sh/acme.sh --renew -d xray.way-run.com --yes-I-know-dns-manual-mode-enough-go-ahead-please --force
然后会更新SSL文件,成功后,请输入reboot 重启服务器即可,如果执行命令一致错误,可以参考:更新所有证书 用法同单独更新某个证书类似,只需将参数名改为--renew-all: acme.sh --renew-all 强制更新: acme.sh --renew-all --force

Github裏的大佬們用Go語言,重新開發了可視化管理面板X-ui,可完全替代V2-ui,可自建SS/V2ray/Xray/Trojan等熱門的協議,並可以實時查看VPS服務器性能狀態和流量的使用狀態。它兼容性更強、更易於維護、性能更好、內存佔用也低。
第五步:安装X-ui面板,通过一键安装脚本;
bash <(curl -Ls https://raw.githubusercontent.com/vaxilu/x-ui/master/install.sh)

登录后:启动并修改为443端口[选择保存配置,重启面板] ,目前网址: http://xray.way-run.com:54321


保存配置后重启面板就可以访问: https://xray.way-run.com 直接访问了
节点生成:(Vmess+TSL+WS协议) 现在生成第一个链接设置(很重要 ): 为了防止IP如果被封如何访问的问题,请使用CloudFlare的小云朵开启后能访问特定端口的方式做节点和链接的端口生成,现在将CloudFlare的特定端口列出来给大家分享如下:

使用方式:如果您IP被封了请登录CloudFlare开启这个子域名的小云朵,等什么时候您IP被解封了之后,您再关闭小云朵取消代理即可,一次设置,终身受益,如果您采用CloudFlare的免费小云朵方式拯救您被中国大陆墙掉的IP,CloudFlare默认可以小云朵访问的端口如下:
HTTP使用的端口:80 、8080、8880、2052、2082、2086、2095
HTTPs使用的端口:443、2053、2083、2087、2096、8443
顺便说一句:Finalshell很垃圾,请用Xshell专业软件
WinSCP绿色软件下载点击此处:https://linuxword.com/wp-content/uploads/2021/11/WinSCP.zip
Xshell绿色破解版下载点击此处:https://linuxword.com/wp-content/uploads/2021/11/Xshell.zip

如果你IP被封了的情况下?如何启用CloudFlare解决你IP被墙的问题?等IP放出来了再恢复即可,简单说:解决IP被墙,因为端口号是跟cloudflare一致的,只需要修改启动”小云朵“即可!

附加题:第六步:选择安装TeleGram的MTP协议,MTP电报代理协议一键安装代码;
mkdir -p /home/mtproxy && \
cd /home/mtproxy && \
curl -s -o mtproxy.sh https://raw.githubusercontent.com/ellermister/mtproxy/master/mtproxy.sh && \
chmod +x mtproxy.sh && \
bash mtproxy.sh && \
echo "@reboot root bash /home/mtproxy/mtproxy.sh start" >> /etc/crontab && \
echo "MtProxy 已安装并设置为开机自动启动"

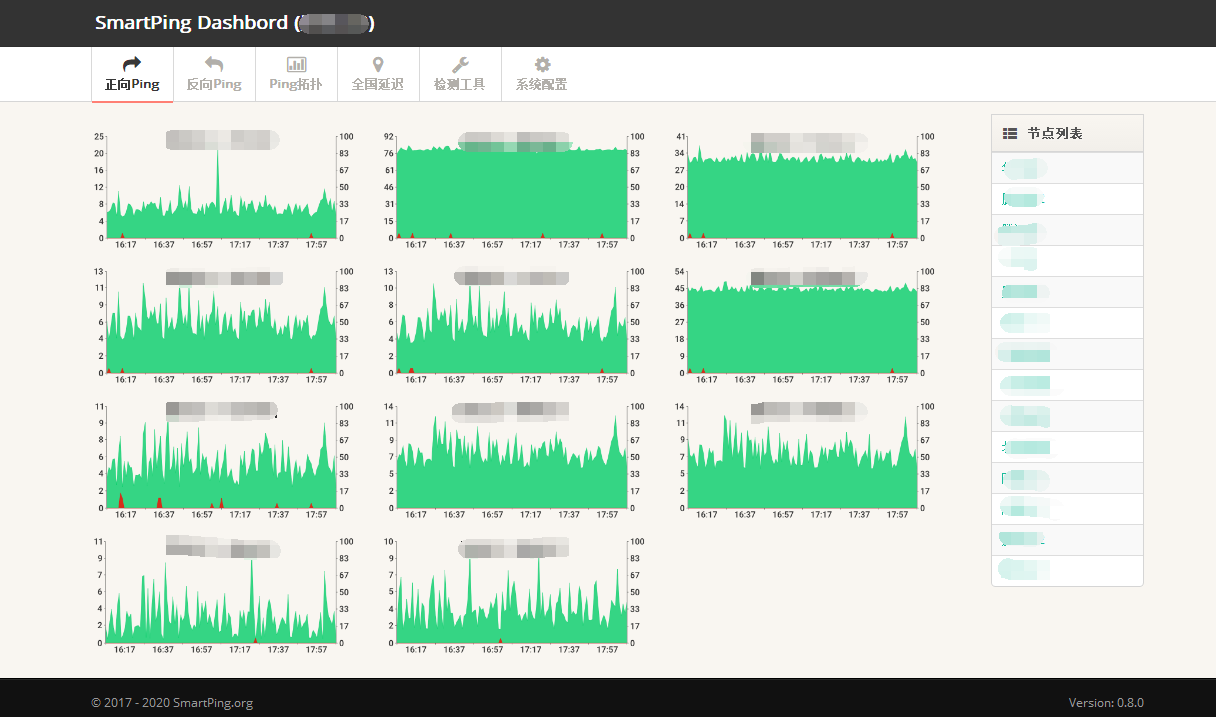
附加题:第七步:选择安装Smartping的监控页面:
网络质量检测代码:
mkdir /home/smartping && cd /home/smartping && wget https://github.com/smartping/smartping/releases/download/v0.8.0/smartping-v0.8.0.tar.gz && tar zxvf smartping-v0.8.0.tar.gz && ./control start && bash /home/smartping/control restart
每一次重启服务器执行: bash /home/smartping/control restart
进阶题-自动进行内存优化和系统清理请见GitHub开源地址:https://github.com/FoxBary/smallvps 操作如下:
手动安装说明:
第一步:先下载两个文件放入 /opt 文件夹
cd /opt && wget https://linuxword.com/wp-content/uploads/2022/AppStore/script/cron/cleanLog.sh && wget https://linuxword.com/wp-content/uploads/2022/AppStore/script/cron/cleanCache.sh && chmod 777 /opt

第二步:将两句执行的话放入到计划启动中:
crontab -e 后输入并保存退出

*/3 * * * * sh /opt/cleanCache.sh
*/2 * * * * sh /opt/cleanlog.sh

contrel+x 保存退出

常用软件下载地址:
Windows电脑版本下载: v2rayN 下载地址: https://linuxword.com/wp-content/uploads/2022/04/v2rayN.zip
Android(安卓手机)V2RAYN.APK下载地址: v2rayNG 地址: https://linuxword.com/wp-content/uploads/2022/04/V2rayNG.apk
Windows7激活工具: https://linuxword.com/wp-content/uploads/2022/01/KMSpico.exe
运行库下载:https://linuxword.com/wp-content/uploads/2022/01/windell.exe
GooGleChrome下载:https://linuxword.com/wp-content/uploads/2022/01/GooGleChrome.exe
Microsoft .net framework4.0下载:https://linuxword.com/wp-content/uploads/2022/01/dotNetFx40_Full_x86_x64.exe
Windows10激活工具:https://linuxword.com/wp-content/uploads/2021/11/DigitalLicense.zip
WinSCP绿色软件下载点击此处:https://linuxword.com/wp-content/uploads/2021/11/WinSCP.zip
Xshell绿色破解版下载点击此处:https://linuxword.com/wp-content/uploads/2021/11/Xshell.zip
Disney+的安卓APP下载地址: https://linuxword.com/wp-content/uploads/2022/AppStore/Disney+.apk
GooGle的安卓APP下载地址: https://linuxword.com/wp-content/uploads/2022/AppStore/Google.apk
GooGleVoice的安卓APP下载地址: https://linuxword.com/wp-content/uploads/2022/AppStore/GoogleVoice.apk
Netflix的安卓APP下载地址: https://linuxword.com/wp-content/uploads/2022/AppStore/Netflix.apk
TeleGram的安卓APP下载地址: https://linuxword.com/wp-content/uploads/2022/AppStore/Telegram.apk
Twitter的安卓APP下载地址: https://linuxword.com/wp-content/uploads/2022/AppStore/Twitter.apk
Youtube的安卓APP下载地址: https://linuxword.com/wp-content/uploads/2022/AppStore/Youtube.apk
ChatGPT的安卓APP下载地址: https://linuxword.com/wp-content/uploads/2022/AppStore/ChatGPT.apk

如何把Linux的VPS通过DD变一台Windows服务器
第一步通过SSH登录VPS服务器并执行命令,更新系统和依赖:
#Debian/Ubuntu系统:
apt -y update && apt install -y xz-utils openssl gawk file curl wget screen && screen -S windows
#RedHat/CentOS系统:
yum -y update && yum install -y xz openssl gawk file screen && screen -S windows
第二步:选择您需要的windows版本,我们推荐如下两个简洁版本
Windows7 版本服务器[默认账户:Administrator ;默认密码是:nat.ee]:
wget --no-check-certificate -qO InstallNET.sh 'https://d.02es.com/InstallNET.sh' && bash InstallNET.sh -dd 'https://d.02es.com/Windows/Win7_sp1_64_Administrator_nat.ee.gz'
Windows10版本服务器 [默认账户:Administrator ;默认密码是:Vicer]:
wget --no-check-certificate -qO InstallNET.sh 'https://d.02es.com/InstallNET.sh' && bash InstallNET.sh -dd 'https://d.02es.com/Windows/Win10_2019LTSC_64_Administrator_Vicer.gz'
自定义DD包地址
示例脚本,补全DD包直连地址后运行即可;
# DD Windows Server 2008 R2 64位 精简版 [账户Administrator密码nat.ee]
wget --no-check-certificate -qO InstallNET.sh 'https://d.02es.com/InstallNET.sh' && bash InstallNET.sh -dd 'https://d.02es.com/Windows/Win_Server2008R2_sp1_64_Administrator_nat.ee.gz'
# DD Windows Server 2012 R2 64位 精简版 [账户Administrator密码nat.ee]
wget --no-check-certificate -qO InstallNET.sh 'https://d.02es.com/InstallNET.sh' && bash InstallNET.sh -dd 'https://d.02es.com/Windows/Win_Server2012R2_64_Administrator_nat.ee.gz'
# DD Windows Server 2016 64位 精简版 [账户Administrator密码nat.ee]
wget --no-check-certificate -qO InstallNET.sh 'https://d.02es.com/InstallNET.sh' && bash InstallNET.sh -dd 'https://d.02es.com/Windows/Win_Server2016_64_Administrator_nat.ee.gz'
# DD Windows Server 2019 64位 精简版 [账户Administrator密码WinSrv2019dc-Chinese]
wget --no-check-certificate -qO InstallNET.sh 'https://d.02es.com/InstallNET.sh' && bash InstallNET.sh -dd 'https://d.02es.com/Windows/Win_Server2019_64_Administrator_WinSrv2019dc-Chinese.gz'
# DD Windows Server 2022 64位 精简版 [账户Administrator密码nat.ee]
wget --no-check-certificate -qO InstallNET.sh 'https://d.02es.com/InstallNET.sh' && bash InstallNET.sh -dd 'https://d.02es.com/Windows/Win_Server2022_64_Administrator_nat.ee.gz'
# DD Windows Server 2022 64位 DataCenter版 [账户Administrator密码DataCenter]
wget --no-check-certificate -qO InstallNET.sh 'https://d.02es.com/InstallNET.sh' && bash InstallNET.sh -dd 'https://d.02es.com/Windows/Disk_Windows_Server_2022_DataCenter_CN_v2.12.vhd.gz'
# DD Windows7 32位 精简版 [账户Administrator密码nat.ee]
wget --no-check-certificate -qO InstallNET.sh 'https://d.02es.com/InstallNET.sh' && bash InstallNET.sh -dd 'https://d.02es.com/Windows/Win7_86_Administrator_nat.ee.gz'
# DD Windows7 sp1 64位 企业精简版 [账户Administrator密码nat.ee]
wget --no-check-certificate -qO InstallNET.sh 'https://d.02es.com/InstallNET.sh' && bash InstallNET.sh -dd 'https://d.02es.com/Windows/Win7_sp1_64_Administrator_nat.ee.gz'
# DD Windows8.1 64位 专业精简版 [账户Administrator密码nat.ee]
wget --no-check-certificate -qO InstallNET.sh 'https://d.02es.com/InstallNET.sh' && bash InstallNET.sh -dd 'https://d.02es.com/Windows/Win8.1_64_Administrator_nat.ee.gz'
# DD Windows10 2016LTSB 64位 企业深度精简版 [账户Administrator密码nat.ee]
wget --no-check-certificate -qO InstallNET.sh 'https://d.02es.com/InstallNET.sh' && bash InstallNET.sh -dd 'https://d.02es.com/Windows/Win10_2016LTSB_64_Administrator_nat.ee.gz'
# DD Windows10 2019LTSC 64位 企业适量精简版 [账户Administrator密码Vicer]
wget --no-check-certificate -qO InstallNET.sh 'https://d.02es.com/InstallNET.sh' && bash InstallNET.sh -dd 'https://d.02es.com/Windows/Win10_2019LTSC_64_Administrator_Vicer.gz'
精简版DD包
如果没有自己的DD包,可以使用博主提供的包,从以下版本中选择自己需要的系统,然后输入一键脚本即可;
# DD Windows Server 2008 R2 64位 精简版 [账户Administrator密码nat.ee]
wget --no-check-certificate -qO InstallNET.sh 'https://d.02es.com/InstallNET.sh' && bash InstallNET.sh -dd 'https://d.02es.com/Windows/Win_Server2008R2_sp1_64_Administrator_nat.ee.gz'
# DD Windows Server 2012 R2 64位 精简版 [账户Administrator密码nat.ee]
wget --no-check-certificate -qO InstallNET.sh 'https://d.02es.com/InstallNET.sh' && bash InstallNET.sh -dd 'https://d.02es.com/Windows/Win_Server2012R2_64_Administrator_nat.ee.gz'
# DD Windows Server 2016 64位 精简版 [账户Administrator密码nat.ee]
wget --no-check-certificate -qO InstallNET.sh 'https://d.02es.com/InstallNET.sh' && bash InstallNET.sh -dd 'https://d.02es.com/Windows/Win_Server2016_64_Administrator_nat.ee.gz'
# DD Windows Server 2019 64位 精简版 [账户Administrator密码WinSrv2019dc-Chinese]
wget --no-check-certificate -qO InstallNET.sh 'https://d.02es.com/InstallNET.sh' && bash InstallNET.sh -dd 'https://d.02es.com/Windows/Win_Server2019_64_Administrator_WinSrv2019dc-Chinese.gz'
# DD Windows Server 2022 64位 精简版 [账户Administrator密码nat.ee]
wget --no-check-certificate -qO InstallNET.sh 'https://d.02es.com/InstallNET.sh' && bash InstallNET.sh -dd 'https://d.02es.com/Windows/Win_Server2022_64_Administrator_nat.ee.gz'
# DD Windows Server 2022 64位 DataCenter版 [账户Administrator密码DataCenter]
wget --no-check-certificate -qO InstallNET.sh 'https://d.02es.com/InstallNET.sh' && bash InstallNET.sh -dd 'https://d.02es.com/Windows/Disk_Windows_Server_2022_DataCenter_CN_v2.12.vhd.gz'
# DD Windows7 32位 精简版 [账户Administrator密码nat.ee]
wget --no-check-certificate -qO InstallNET.sh 'https://d.02es.com/InstallNET.sh' && bash InstallNET.sh -dd 'https://d.02es.com/Windows/Win7_86_Administrator_nat.ee.gz'
# DD Windows7 sp1 64位 企业精简版 [账户Administrator密码nat.ee]
wget --no-check-certificate -qO InstallNET.sh 'https://d.02es.com/InstallNET.sh' && bash InstallNET.sh -dd 'https://d.02es.com/Windows/Win7_sp1_64_Administrator_nat.ee.gz'
# DD Windows8.1 64位 专业精简版 [账户Administrator密码nat.ee]
wget --no-check-certificate -qO InstallNET.sh 'https://d.02es.com/InstallNET.sh' && bash InstallNET.sh -dd 'https://d.02es.com/Windows/Win8.1_64_Administrator_nat.ee.gz'
# DD Windows10 2016LTSB 64位 企业深度精简版 [账户Administrator密码nat.ee]
wget --no-check-certificate -qO InstallNET.sh 'https://d.02es.com/InstallNET.sh' && bash InstallNET.sh -dd 'https://d.02es.com/Windows/Win10_2016LTSB_64_Administrator_nat.ee.gz'
# DD Windows10 2019LTSC 64位 企业适量精简版 [账户Administrator密码Vicer]
wget --no-check-certificate -qO InstallNET.sh 'https://d.02es.com/InstallNET.sh' && bash InstallNET.sh -dd 'https://d.02es.com/Windows/Win10_2019LTSC_64_Administrator_Vicer.gz'
第三步:在控制面板中观察VmShell的VNC在线查看服务器安装状态(至少需要等待40分钟左右);
第四步:远程登录服务器并激活Windows 系统版本:
Windows服务器开启Ping功能,打开系统运行服务 Win+R 输入命令
## 开启Ping ##
netsh firewall set icmpsetting 8
## 关闭Ping ##
netsh firewall set icmpsetting 8 disable
Windows7激活工具:https://linuxword.com/wp-content/uploads/2022/01/KMSpico.exe
运行库下载:https://linuxword.com/wp-content/uploads/2022/01/windell.exe
GooGleChrome下载:https://linuxword.com/wp-content/uploads/2022/01/GooGleChrome.exe
Microsoft .net framework4.0下载:https://linuxword.com/wp-content/uploads/2022/01/dotNetFx40_Full_x86_x64.exe
Windows10激活工具:https://linuxword.com/wp-content/uploads/2021/11/DigitalLicense.zip
常用服务器代码:
一键查看服务器信息和网络情况:
wget -O superbench.sh mcnb.top/superbench.sh && bash superbench.sh

八合一脚本:
wget -P /root -N --no-check-certificate "https://raw.githubusercontent.com/mack-a/v2ray-agent/master/install.sh" && chmod 700 /root/install.sh && /root/install.sh
流媒体检测
bash <(curl -L -s https://raw.githubusercontent.com/lmc999/RegionRestrictionCheck/main/check.sh)
三网测速脚本:
bash <(curl -Lso- https://git.io/superspeed)

#一键开启bbr脚本
wget --no-check-certificate https://github.com/teddysun/across/raw/master/bbr.sh && chmod +x bbr.sh && ./bbr.sh
#bbr 原版/魔改/plus+锐速 四合一脚本 使用说明:https://zkxblog.com/61.html
wget --no-check-certificate https://github.com/cx9208/Linux-NetSpeed/raw/master/tcp.sh && chmod +x tcp.sh && ./tcp.sh
#superbench 检测脚本
wget -qO- --no-check-certificate https://raw.githubusercontent.com/oooldking/script/master/superbench.sh | bash
#bench 检测脚本
wget -qO- bench.sh | bash
#zbench(中文)检测脚本
wget --no-check-certificate https://raw.githubusercontent.com/FunctionClub/ZBench/master/ZBench-CN.sh && bash ZBench-CN.sh
#zbench(英文)检测脚本
wget --no-check-certificate https://raw.githubusercontent.com/FunctionClub/ZBench/master/ZBench.sh && bash ZBench.sh
#LemonBench 综合检测脚本(检测耗时较长,建议screen)
wget -qO- https://ilemonrain.com/download/shell/LemonBench.sh | bash -s full
#硬盘通电时间 检测脚本
wget -q https://github.com/Aniverse/A/raw/i/a && bash a
#unixbench 性能跑分脚本
wget --no-check-certificate https://github.com/teddysun/across/raw/master/unixbench.sh && chmod +x unixbench.sh && ./unixbench.sh
「梦想一旦被付诸行动,就会变得神圣,如果觉得我的文章对您有用,请帮助本站成长」


al2359(3年前 (2023-02-06))